How to Make a Checkerboard Cake
2242 days ago

I love to bake and try new techniques that challenge me, so this checkerboard cake is right up my alley. Normally when you’re making this type of cake, you can purchase some tools to assist you in the process, but honestly I really don’t want more kitchen tools, especially for something that I’m not going to make every month. Let’s just say I already have a storage issue.
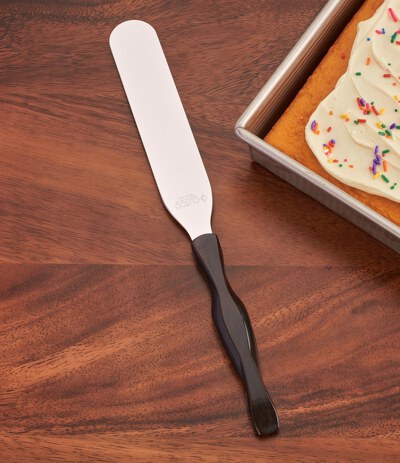
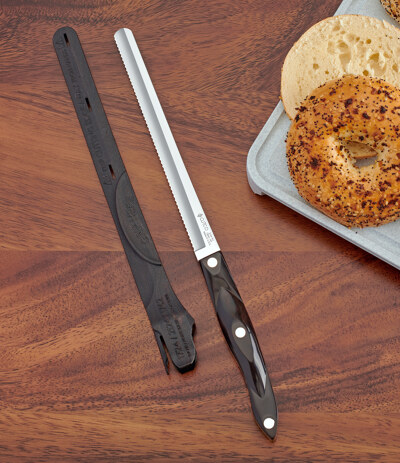
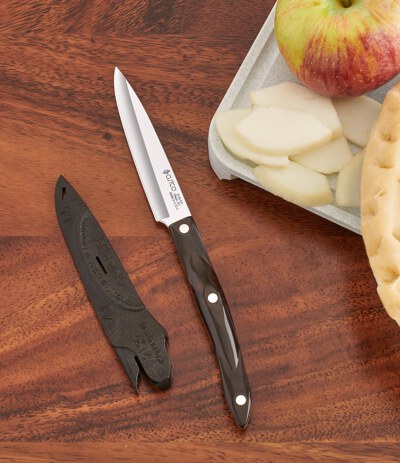
We figured there was an easy way to make this impressive cake by using what we already had in our kitchen, specifically, our Cutco Knives. We used the 7-3/4" Petite Slicer to level the cakes, the 4" Paring Knife for the delicate cutting of the cake rings, the Professional Spatula to carefully crumb coat and frost the cake, and then the Slice n’ Serve to cut servings of the cake. I think you’ll agree, it turned out beautiful and it was actually a lot of fun.
I will tell you that this requires a bit of patience in preparation but the end result is well worth the effort. Make this the next time you have a special celebration. It will truly impress your guests.
Make Your Cakes
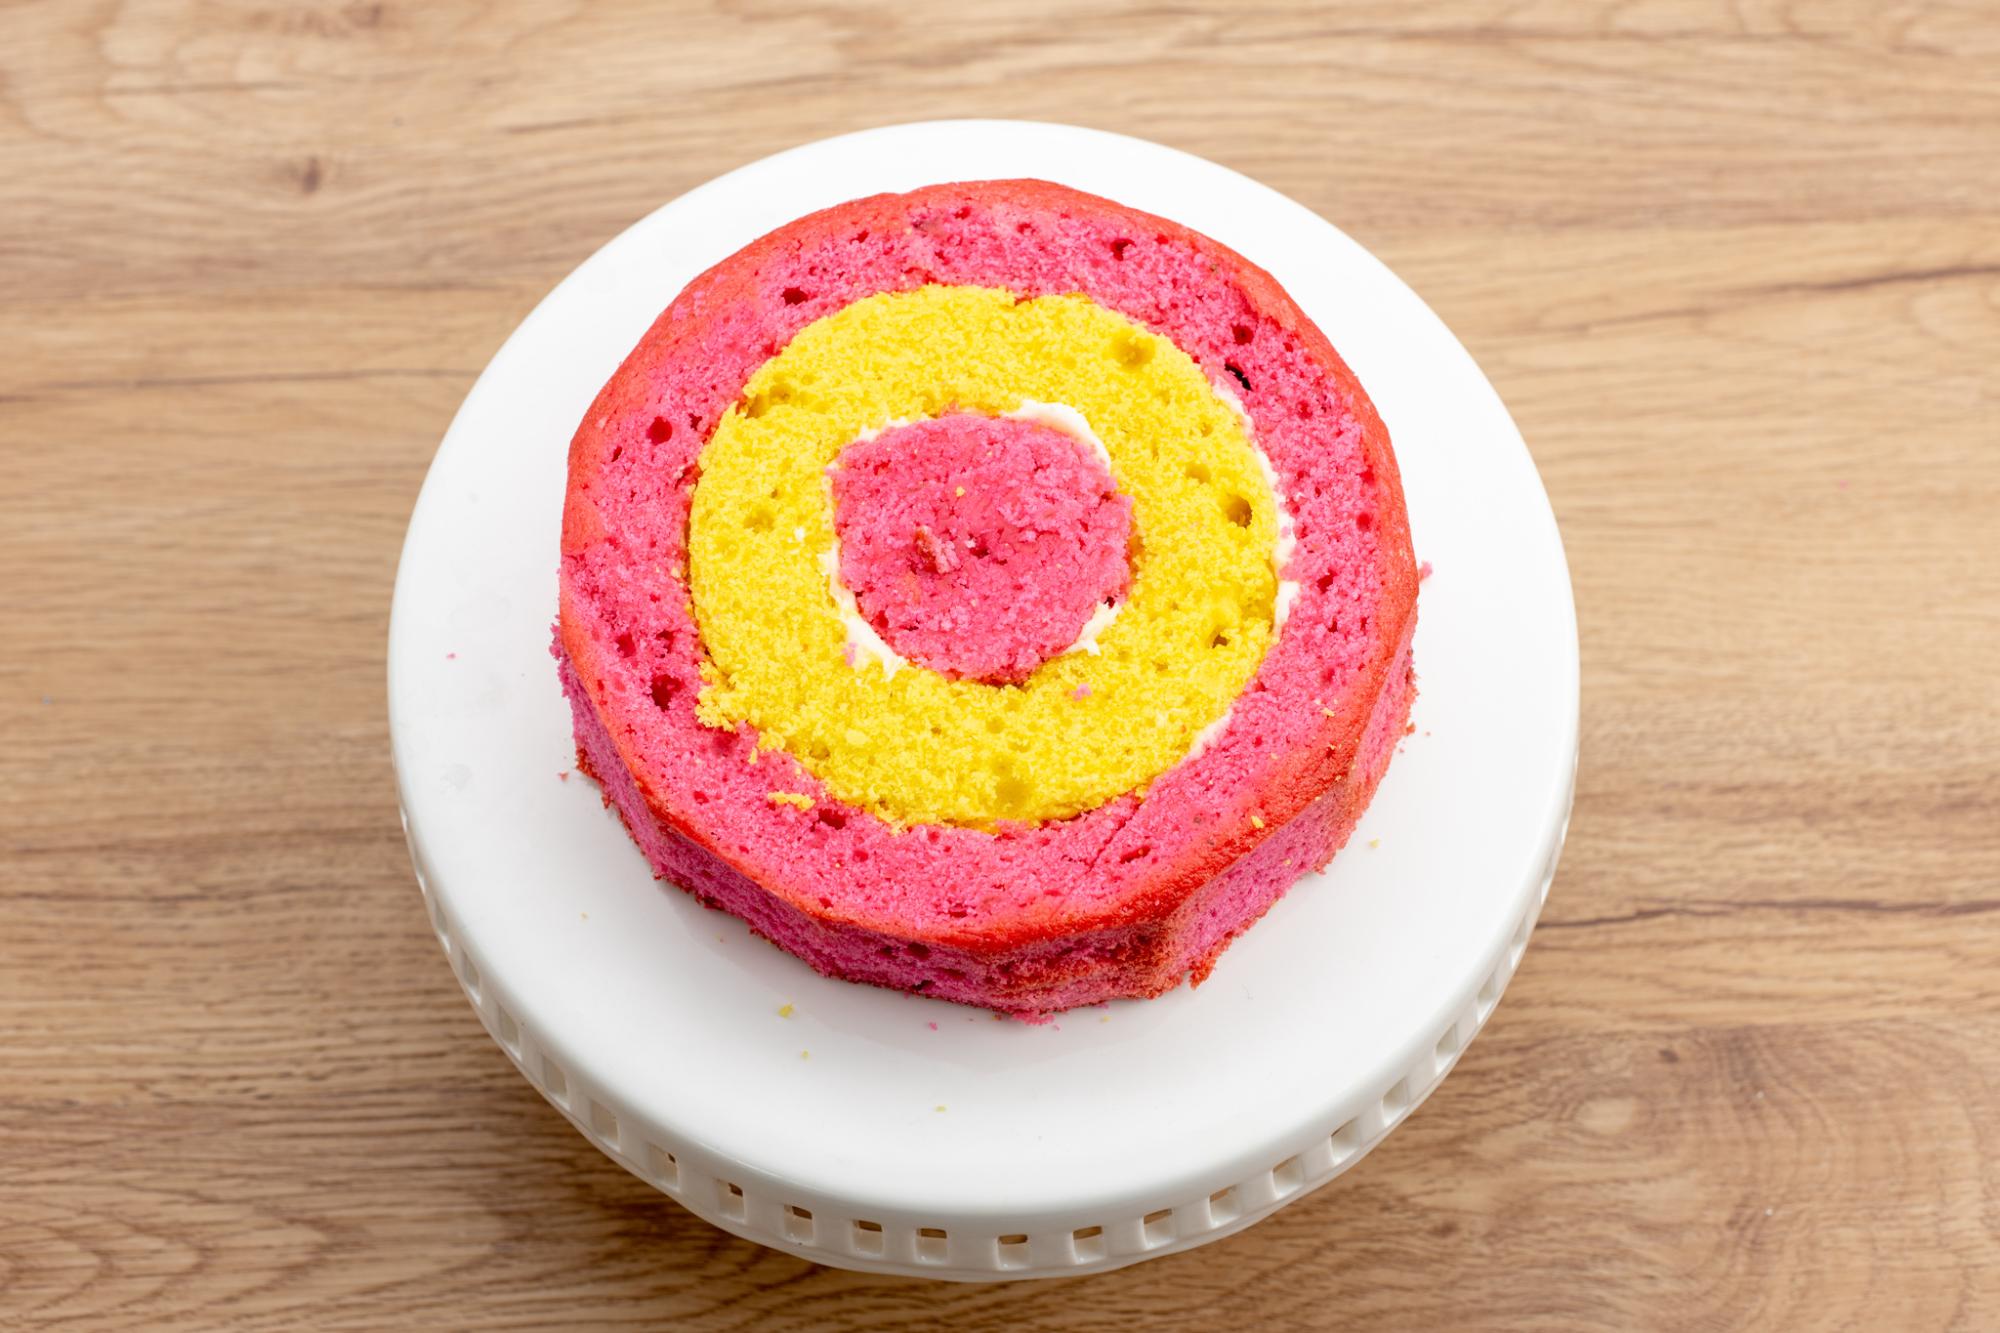
Make your favorite white cake batter, enough for two entire cakes. Color half the batter with food coloring (color A) and color the other half with contrasting food coloring (color B). Also consider adding flavoring to each color. Add color A batter to two 6-inch round cake pans and the color B batter in two other 6-inch round cake pans. Bake according to instructions. NOTE: Let cakes completely cool before starting.
For our cakes we used yellow food gel in half of the batter, flavored with lemon juice and lemon zest. The other half was colored with pink food gel and flavored with two tablespoons of strawberry preserves.
How to Make the Checkerboard Cake
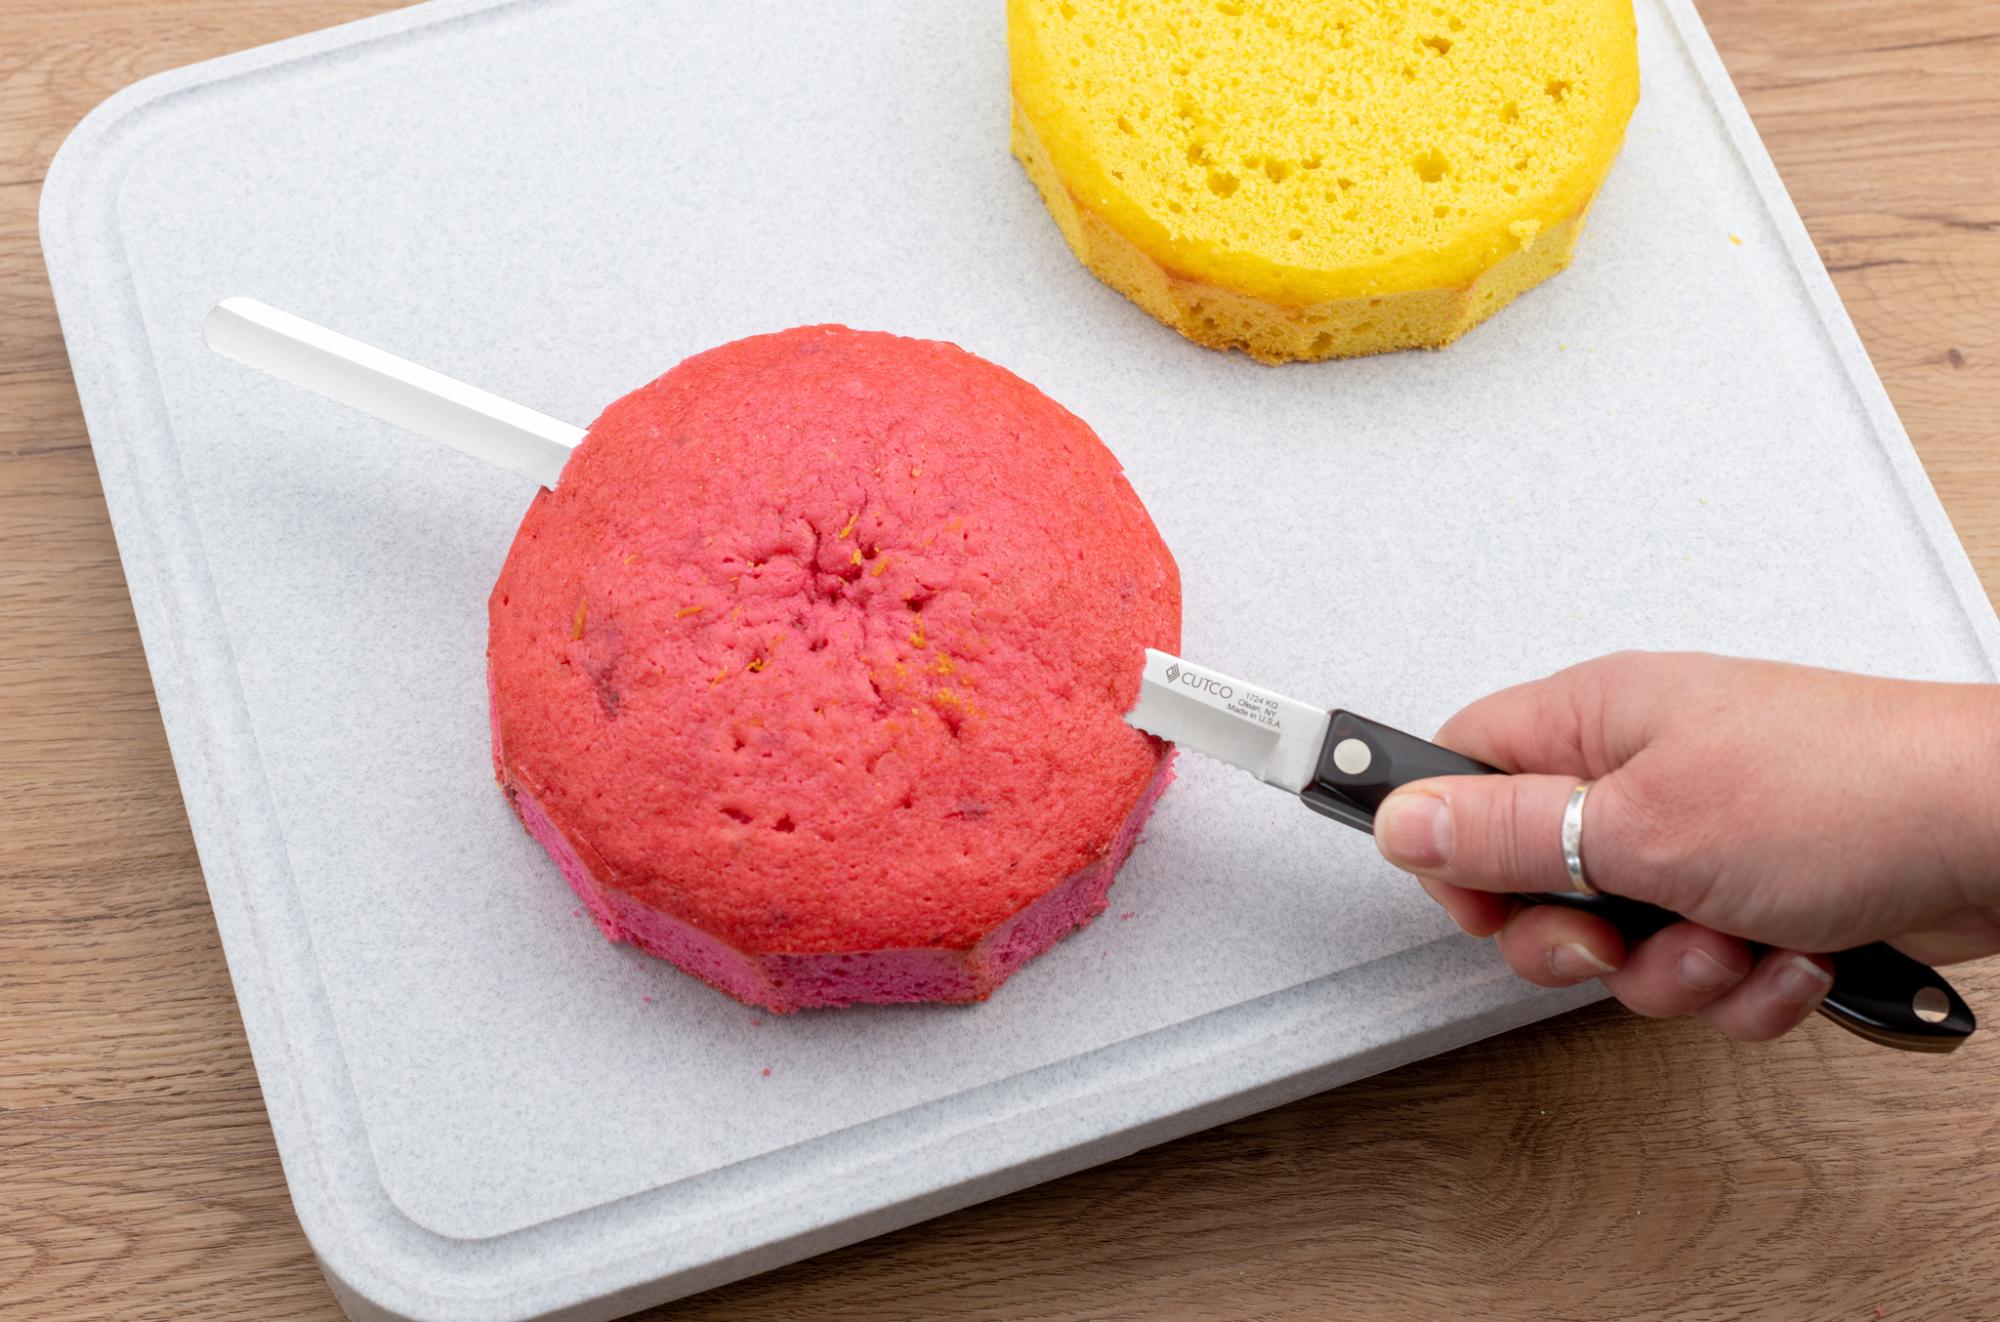
- Remove the cakes from the pans and use a 7-3/4" Petite Slicer to carefully level them off, slicing the rounded top off of each cake. They should all be the same height – about one-inch thick.
- For cutting the circles, draw a 4-inch circle and a 2-inch circle on parchment paper to use as a pattern. Cut the circles out using the Super Shears. In place of parchment paper, you could also use ramekins as your guide (you’ll need a 4-inch and 2-inch ramekin).
- Place the 4-inch parchment paper circle in the middle of the first cake (use a toothpick to keep it centered). With a 4" Paring Knife, cut out the center of each cake. Do this on all four of your cakes.
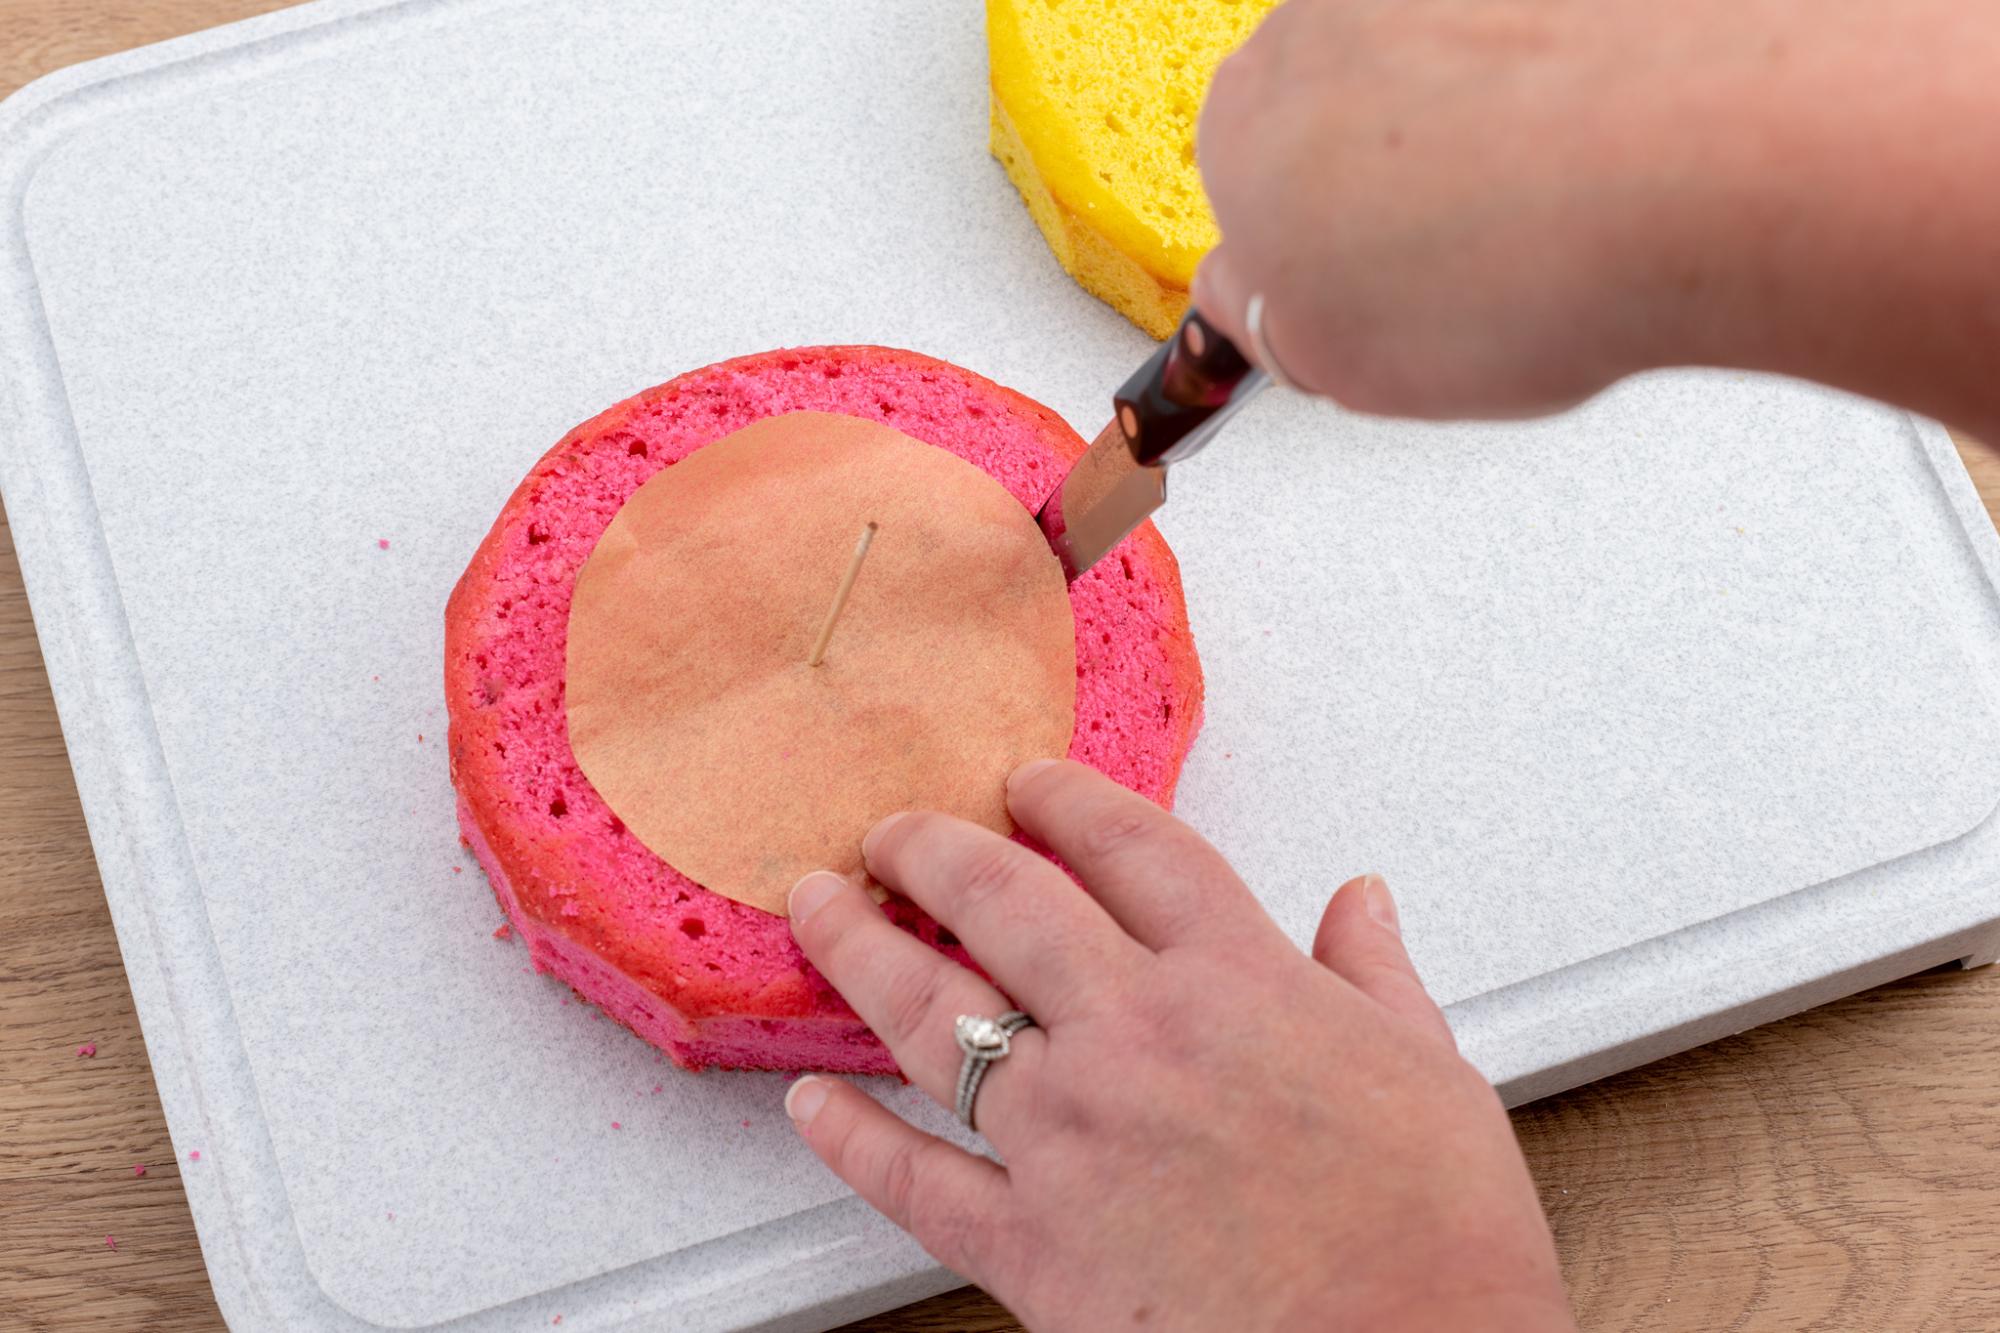
- Place the 2-inch parchment paper circle in the middle of the just-cut cake and cut out the center of each 4-inch cake piece.
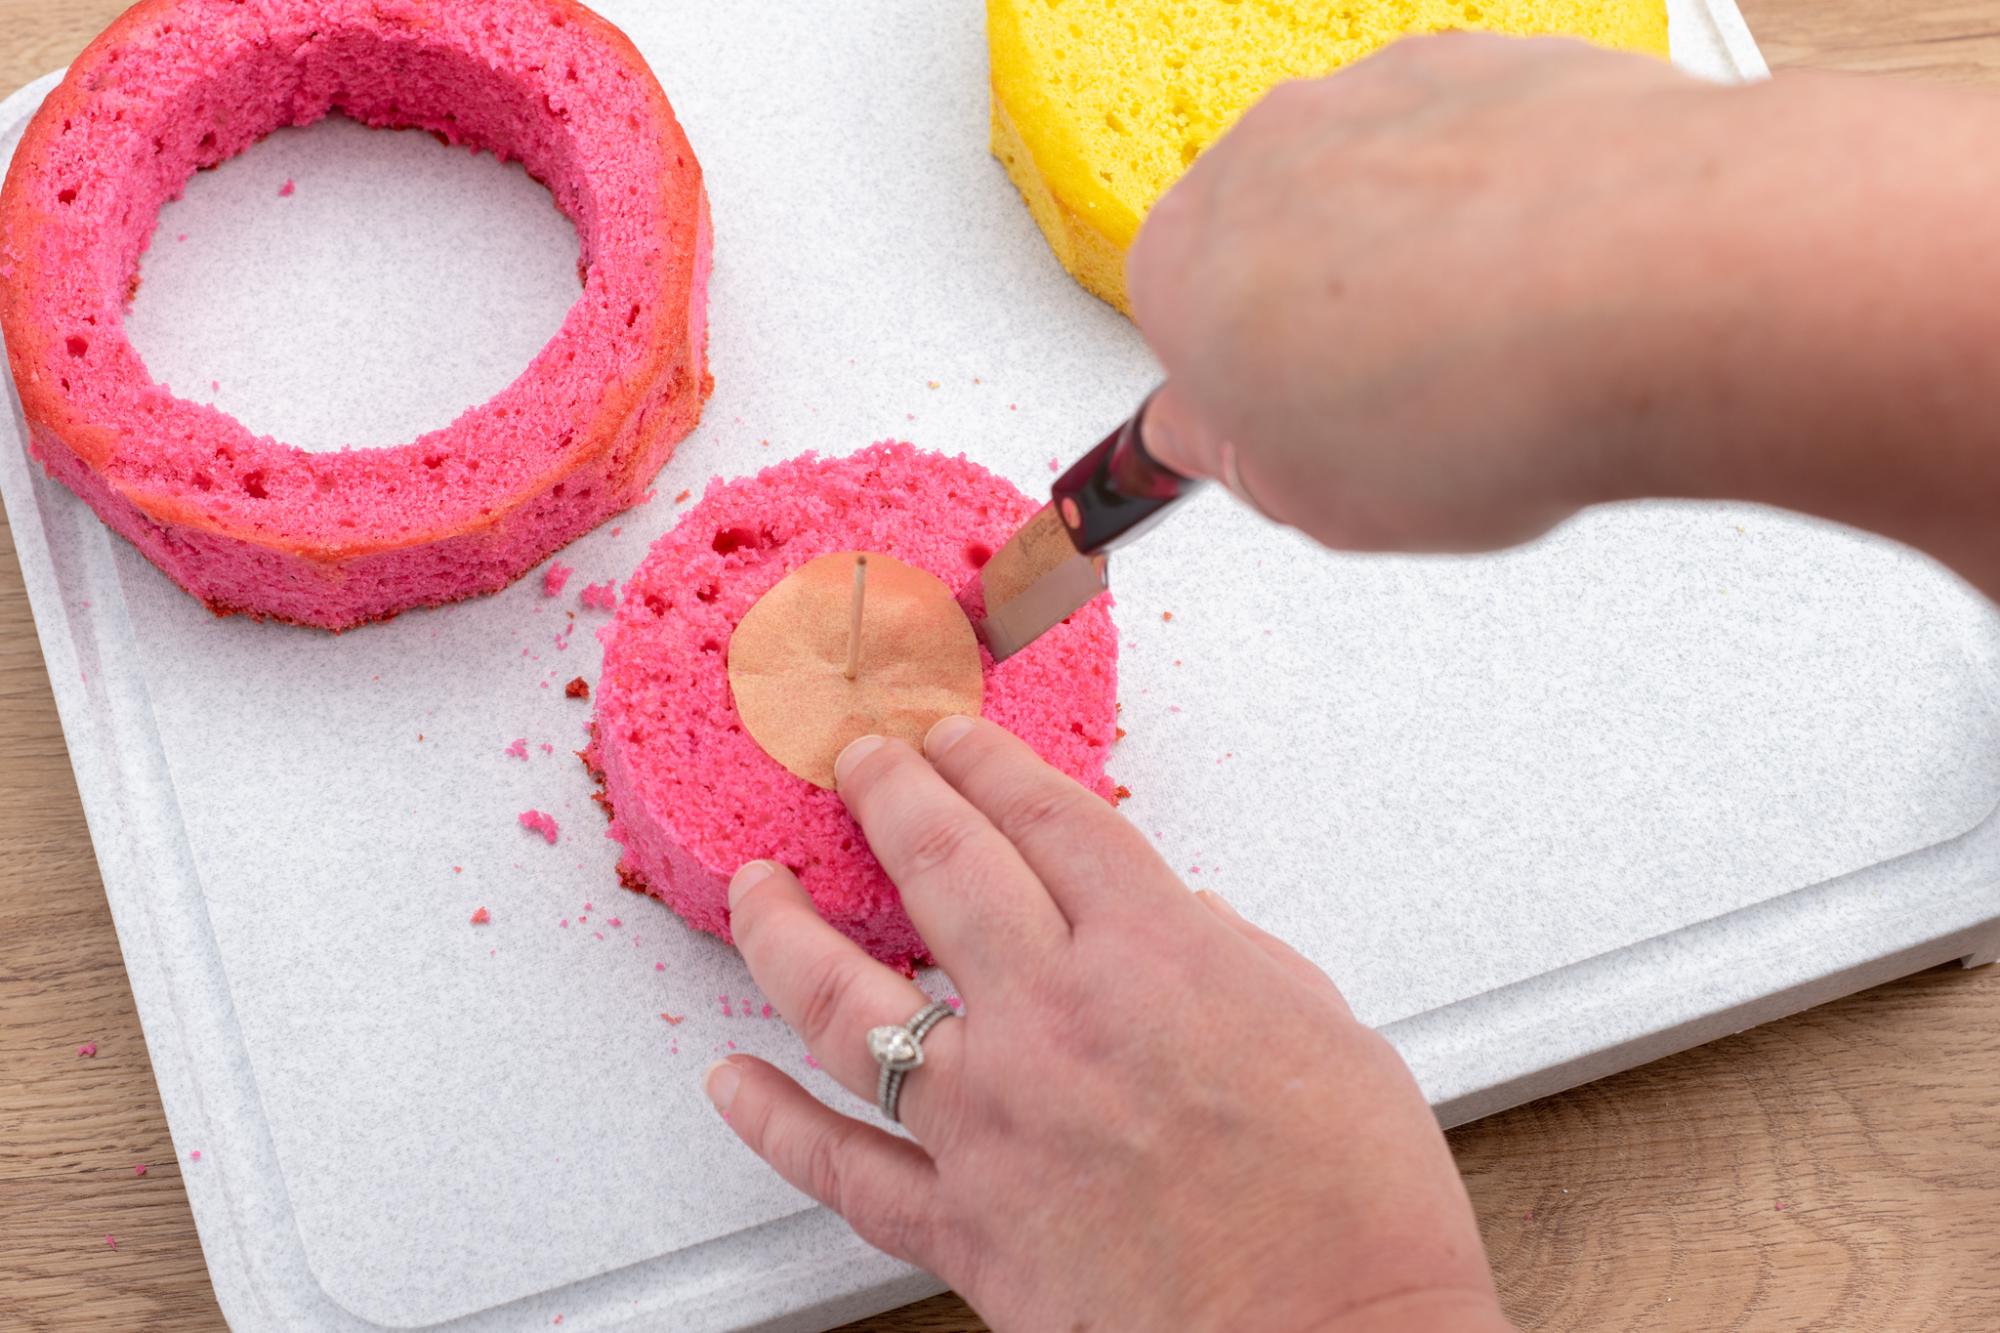
- You should now have two 6-inch rings, two 4-inch rings and two 2-inch rings of yellow cake and the same number and size rings of pink cake.
- Using just a small amount of frosting (we found buttercream to work best) and the Professional Spatula carefully spread a thin layer of frosting on the insides of each 6-inch cake ring. Make sure you don’t put too much frosting on the inside, otherwise it will be difficult to make the rings fit together.
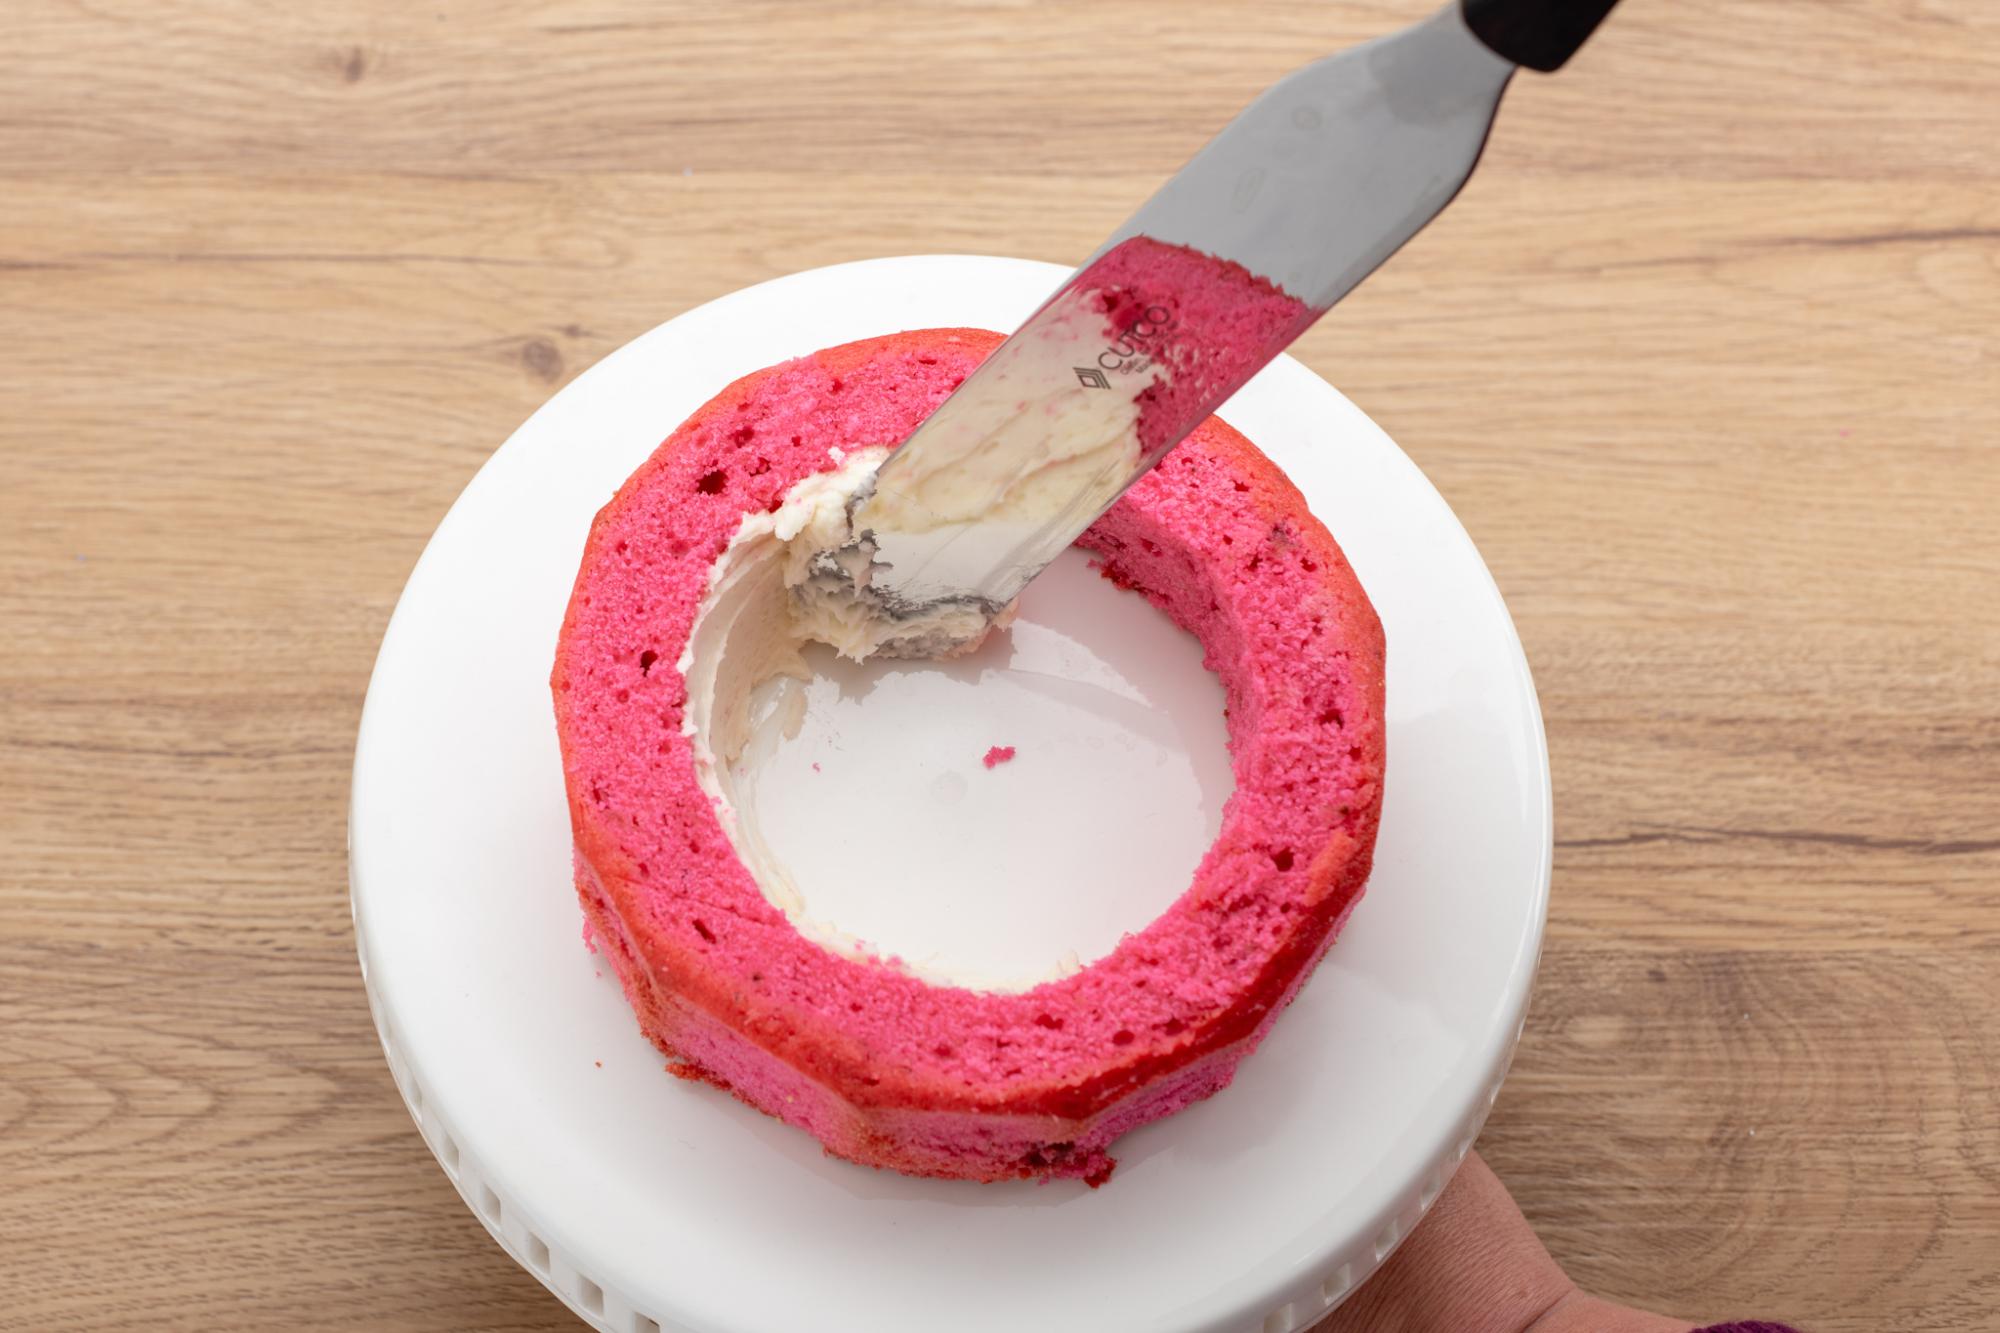
- Place the 6-inch ring of color A on your final serving platter. Take a 4-inch ring of color B and carefully place it inside the 6-inch ring.
- Carefully spread another thin layer of frosting on the inside of the 4-inch ring of color B.
- Place the 2-inch color A cake inside the 4-inch ring of color B. Be careful to not push too much so that you break the outer ring. (If the outer ring starts to crack – use your buttercream to ‘glue’ it together).
- With the base layer complete, apply a thin layer of buttercream on top of this layer.
- Repeat this same process with the remaining rings, alternating colors. Place the 6-inch color B ring on top of the base layer (frost the inside), then the 4-inch color A ring (frost the inside) and then the 2-inch color B piece, applying a thin, smooth layer of buttercream on top of this layer.
- Once all four layers are stacked, crumb coat the entire cake with buttercream by spreading a thin layer of frosting over the cake, sealing the crumbs and prepping the cake for the final layer of frosting. Let the cake chill in the refrigerator for 15 to 20 minutes.

- Take the cake out of the refrigerator and frost the entire cake with buttercream. Finish with a buttercream border and sprinkles (we used a star tip and pastry bag for our cake and then colorful nonpareil sprinkles).
- Put the cake back into the refrigerator for the buttercream to set. Take it out before serving to allow the buttercream to soften a bit (but not too much, as you don’t want the cake to sag).
- Using the Slice n’ Serve, cut into the middle of the cake and take out your first slice.
Recommended Tools